Saturday, July 31, 2010

Earring Holders

While our boys were camping:


And the finished products, complete with our earrings:


As soon as the boys are back, we'll have Steve pound some nails for us to hang these things up with.

We went to the dollar store and bought a meat/grease strainer thing. We decorated it with ric rac, flowers, buttons, ribbon, etc. They turned out cute and easy to make, too.

Friday, July 30, 2010

Necklace T-Shirt


I made these T-shirts this morning for Callie. Our boys are camping, so we had to do some fun "girlie" things. I used puff paint and the end of a pencil, tinker toy, and paint brush for the necklace T-shirt, and just dipped and dotted. For the other t-shirt, it's just iron ons and ric rac. Quick, easy, and fun.

Fried Ice Cream


Marsha made us this yummy dessert for FHE while she was visiting. She got it from her friend, Mindy. It's REALLY GOOD!!!
3 C. Rice Krispies
1 C. Brown Sugar
1 C. chopped pecans
1 1/4 C. coconut
1/2 C. butter
pinch of cinnamon
Preheat oven to 300. Melt butter and stir in the rest of the ingredients. Bake in a 9X13 for 30 minutes, stirring every 10 minutes. Take out of oven and cool. Take half of it out of the 9X13, leaving the rest for the bottom layer. Layer with softened vanilla ice cream. Put the other half of the mixture on top. Squish down to hold it in place. Put dessert in freezer to harden. Cut and serve. You can top it with honey, caramel, chocolate, or any kind of topping.
We topped it with blueberry pie filling. It was delicious.

Thursday, July 22, 2010

Sweet BBQ Chicken Kabobs

Tawnya found this recipe from the sisterscafe.blogspot.com website and they were delicious.
We added zuchinni, yellow squash, and onion chunks.


Jed was gone to Scout Camp all week so we met at Katie's for a couple of days.


Tuesday, July 13, 2010

Pesto Bruschetta


My favorite appetizer at Oregano's is Pesto Bruschetta - if you ever go there, it's not on the menu, but you can still order it (don't ask me why.) The other day, Jen and I tried to recreate it and I think we came pretty close. It is Italian bread topped with pesto, diced red onion, sliced tomatoes, and a blend of Italian cheeses (or whatever you like), and then broiled in the oven.

Jen made the Italian Bread - click here for the recipe. I have made this Italian Bread recipe since then and it is pretty easy and DELICIOUS! The pesto is a recipe Jen found and has been using from The Sisters' Cafe, and they got it from the Barefoot Contessa.

Give this a try - Jen and I loved it so much that we could eat it for dinner, not as an appetizer.

Here are the simple steps:

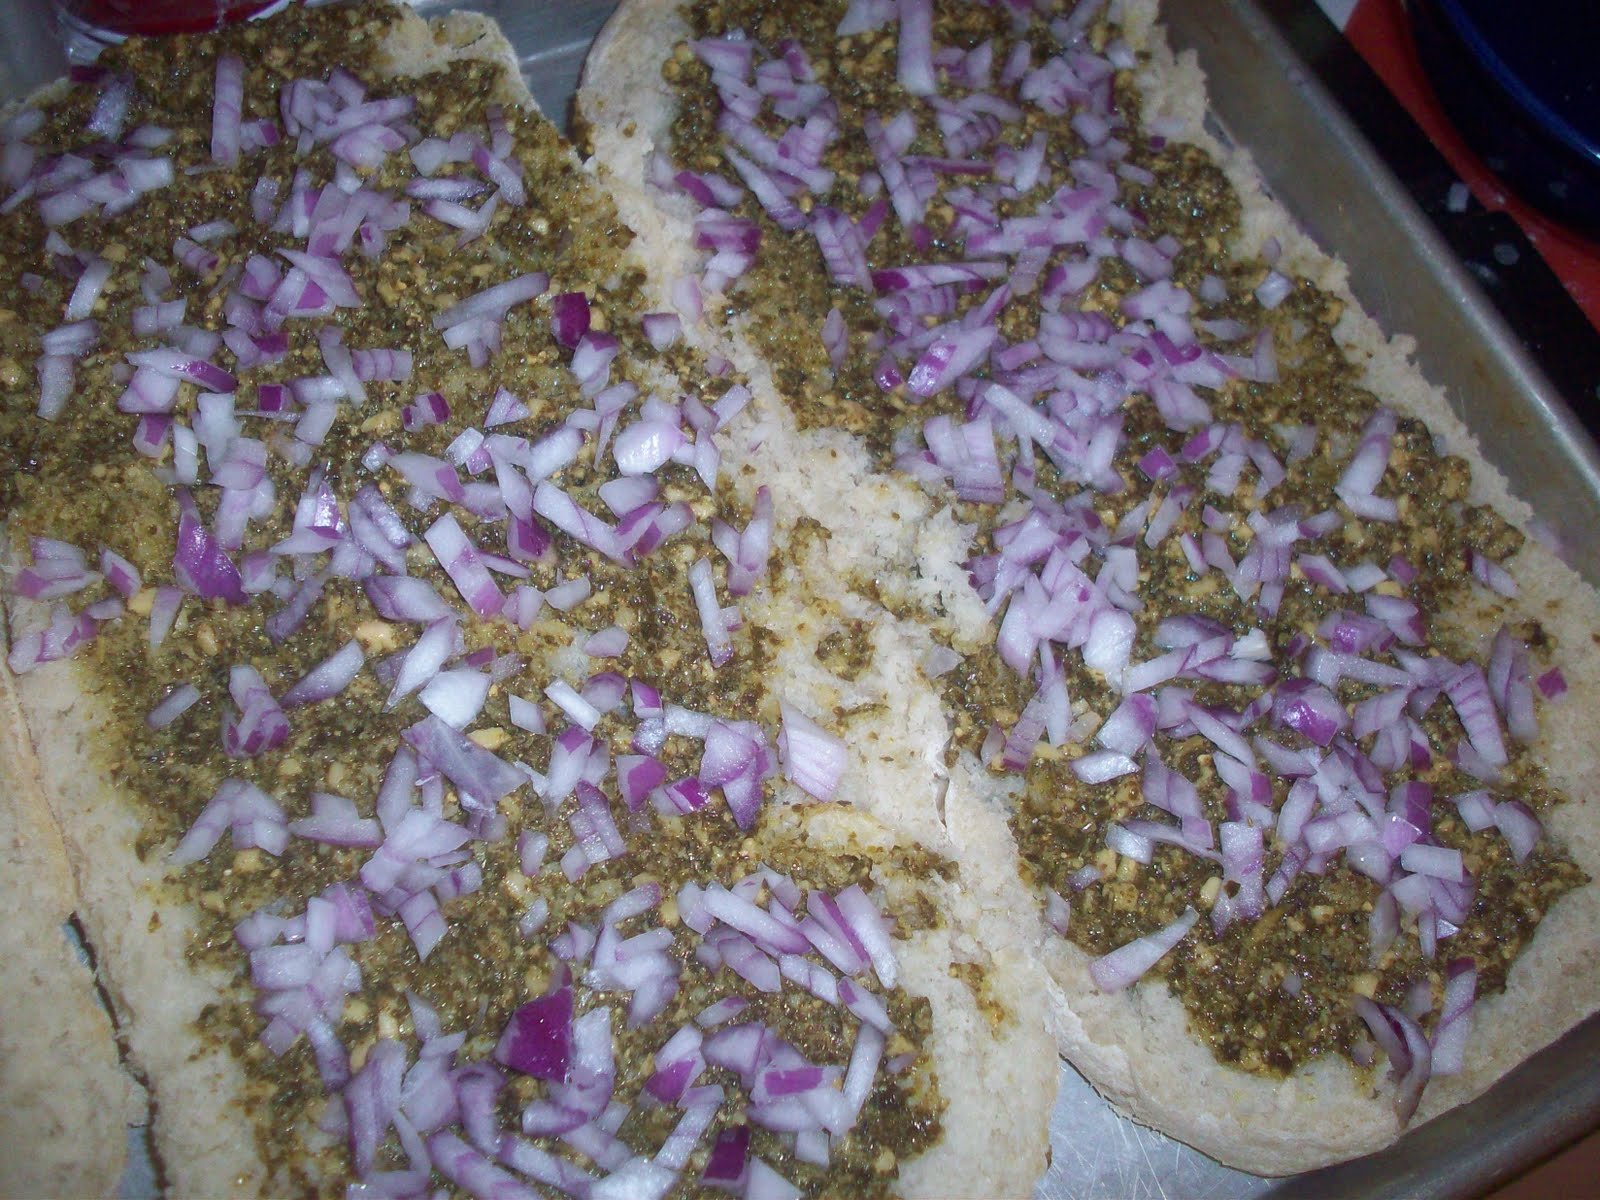
Slice your bread horizontally, and spread pesto on it. Sprinkle chopped red onions on top.


Put sliced tomatoes on top of the red onions.

Sprinkle the Italian blend of cheeses (or whatever cheese you want) on top,
and broil it until it looks good to you.

Friday, July 9, 2010

Car Cozies

Here's another project Camilee and I made over our sewing weekend. They turned out to be so fun. The boys have been playing and playing with these. We mass produced these because of all of our boys. We made 8 altogether.

We got the pattern from Homemade by Jill.


The pattern said to put piping all the way around, but we found that it's too bulky that way and we liked it better on just the top and bottom. Also, it would work just as well to use denim or duck cloth for the outside and just cotton on the inside. It is VERY STURDY the way we made them, with denim and duck cloth all the way through.

And this is after a weekend of sewing.


Wednesday, July 7, 2010

Lunchbags, Placemats, Kleenex Pouches

I was able to go to Camileee's for the weekend and have a sewing fest. It was so much fun. We made some cute stuff. The first project we did was lunchboxes for Madison and Callie. We got the pattern from here. We did make a few changes, like not using a pillowcase like the pattern says to use, but regular fabric and not using the iron on vinyl. We've heard that stuff doesn't wash up well. We wanted these to be machine washable. This was our first time with appliques, and we know how to do it better next time. We will use interfacing on the back so it doesn't pucker.

To square off the corners, we put the two bottoms of the bags together and sewed across the squared part and did them together, instead of squaring separately and then hand sewing the two together. It was easier this way.

This flower is from a tutorial we found here. We did add some purple netting stuff in between each layer. And we just used a hair alligator clip thing on the back to clip it to the handle, so it can be removed to wash.


Next time we aren't going to use twill tape on the casing for the strings. It was a mess to work with. It would be just as good and easier to just hem it under with a rolled em.


We used fusible fleece on the back side of the lining. It was fun. I defintely want to use this stuff again on something. And instead of hand sewing the lining to the outside of the bag, we topstitched with our machines.


This pattern came with a placemat tutorial. How cute! They won't have to put their lunches on the yucky cafeteria tables.


And what little girl doesn't need her own matching Kleenex pouch for her backpack? Here's the tutorial for that.


Thursday, July 1, 2010

STARS


Marsha made these very pretty and fun stars for the 4th of July. I love how they turned out.
The only thing she did different is that she didn't use a succer mold. She just used a candy mold.
Here's the link to where she got the idea from and how to do it.
If you suck on them slowly, you can feel the pop rocks working. Cool, huh? I wish I was there to
test them out! I love pop rocks.